Setting up my journaling app project using Vite, ReactJS and Tailwind - Beginner Friendly

Photo by Andrew Neel on Unsplash
Table of contents
I set out to #buildinpublic about a week ago and settled for a personal project that is meaningful to me. A journalling app which you can read about here.I chose to build it with React JS and Tailwind CSS. I have gotten my feet wet with React-JS and Tailwind CSS more recently. Naturally, I would love to improve my frontend skills with these two, and what better way to do so than to share the process of how I set up using Vite and how to install both ReactJS and Tailwind CSS.
Fun Fact: A friend gifted me the Refactoring UI book and I was super stoked to learn that the authors, Adam Wathan and Steve Schoger are among the original authors of Tailwind CSS, read it here. This sure felt like a full-circle moment for me. I am yet to get used to how cluttered my code looks with Tailwind CSS, but it sure makes up for that in convenience and ease of typing.
That said, I will be sharing how I did my setup, which would perhaps be more beneficial for beginners.
Prerequisites
1. Visual Studio Code for my code editor. This is a personal preference but there are others such as Sublime Text and (the dreaded?) Vim.
2. Node.js for efficient package management with npm or Yarn.
3. Vite for a seamless development environment.
I already had Node.js set up, so all that remained was to scaffold my project using Vite.
Steps
Create the project
The first command I typed in was as below to scaffold my project. The . in the command is to allow me to do so in the folder in which I am currently located, called journalling-app.
npm create vite@latest .
I followed the prompts to select React as that is what I would be using, and Javascript. Once that was done, I needed to run two commands. npm install and npm run dev.
- npm install to allow the required dependencies to be installed for the project to take off smoothly. typically contained in the package.json file
- npm run dev to start the development server.
One of the advantages that Vite has is its ability to provide Hot Module Replacement (HMR). My understanding of this is that Vite simply allows one to change code and see updates immediately without the need for a full page refresh. As expected, this makes for a seamless dev experience.

Installing Tailwind CSS
- The next thing I needed to do was to install Tailwind CSS alongside its dependencies using
npm install -D tailwindcss postcss autoprefixer
This guide on the Tailwind website provides a concise explanation for the same. I realized I hadn't taken the time to know why we include postcss and autoprefixer.
Here's why:
- postcss works by aiding functionality for a host of plugins to yield Vanilla CSS
- `autoprefixer` on the other hand, helps to add vendor prefixes (eg `-moz` for Mozilla, `-webkit-` for Chrome and Safari) as well as parse the CSS code.
2. Install the configuration files
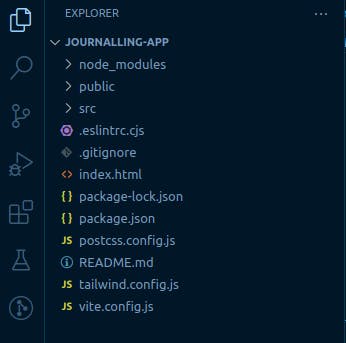
Install the configuration files using npx tailwindcss init -p. These files include tailwind.config.js and postcss.config.js. These files allow customization and full interaction within the project.
As such, my current folder structure looks like this:

3. Template file configuration
This would typically involve adding the paths to all of the template files within the tailwind configuration file.

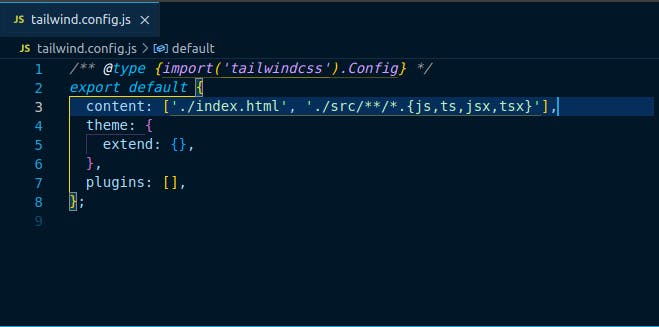
Note the inclusion of the following string under the content option:
content: [ "./index.html", "./src/**/*.{js,ts,jsx,tsx}", ]
This simply tells Tailwind to check out and extract classes found within the HTML file, often used as an entry point file.
Secondly, it also provides a global pattern that instructs Tailwind to check all Javascript (.js .jsx) and Typescript (.ts .tsx) files respectively as included in the `src` directory and to capture these classes.
4. Tailwind directives
Lastly, I needed to add the tailwind directives for each of the layers to the index.css file located in the src directory. After scaffolding with Vite, this file contained some pre-existing styling, so I cleared all of that and added the following instead:
@tailwind base; @tailwind components; @tailwind utilities;
@tailwind base; provides foundational styles.
@tailwind components; to provide style for popular components such as alerts and buttons.
@tailwind utilities; provide the more ubiquitous utility classes for margins, colors and padding among others.
- Start the development server
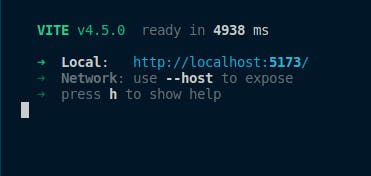
The last command I ran was the aforementioned npm run dev to start the server. This would provide me with a link from where I can view changes to my code.

6. I then started to build the most basic functionality for my journalling app which I will share in the next blog post. For anyone who's just starting with ReactJS/ Tailwind/ Vite, I hope this is helpful! Let me know what you think :) I will see you in the next post.
Happy coding!
